
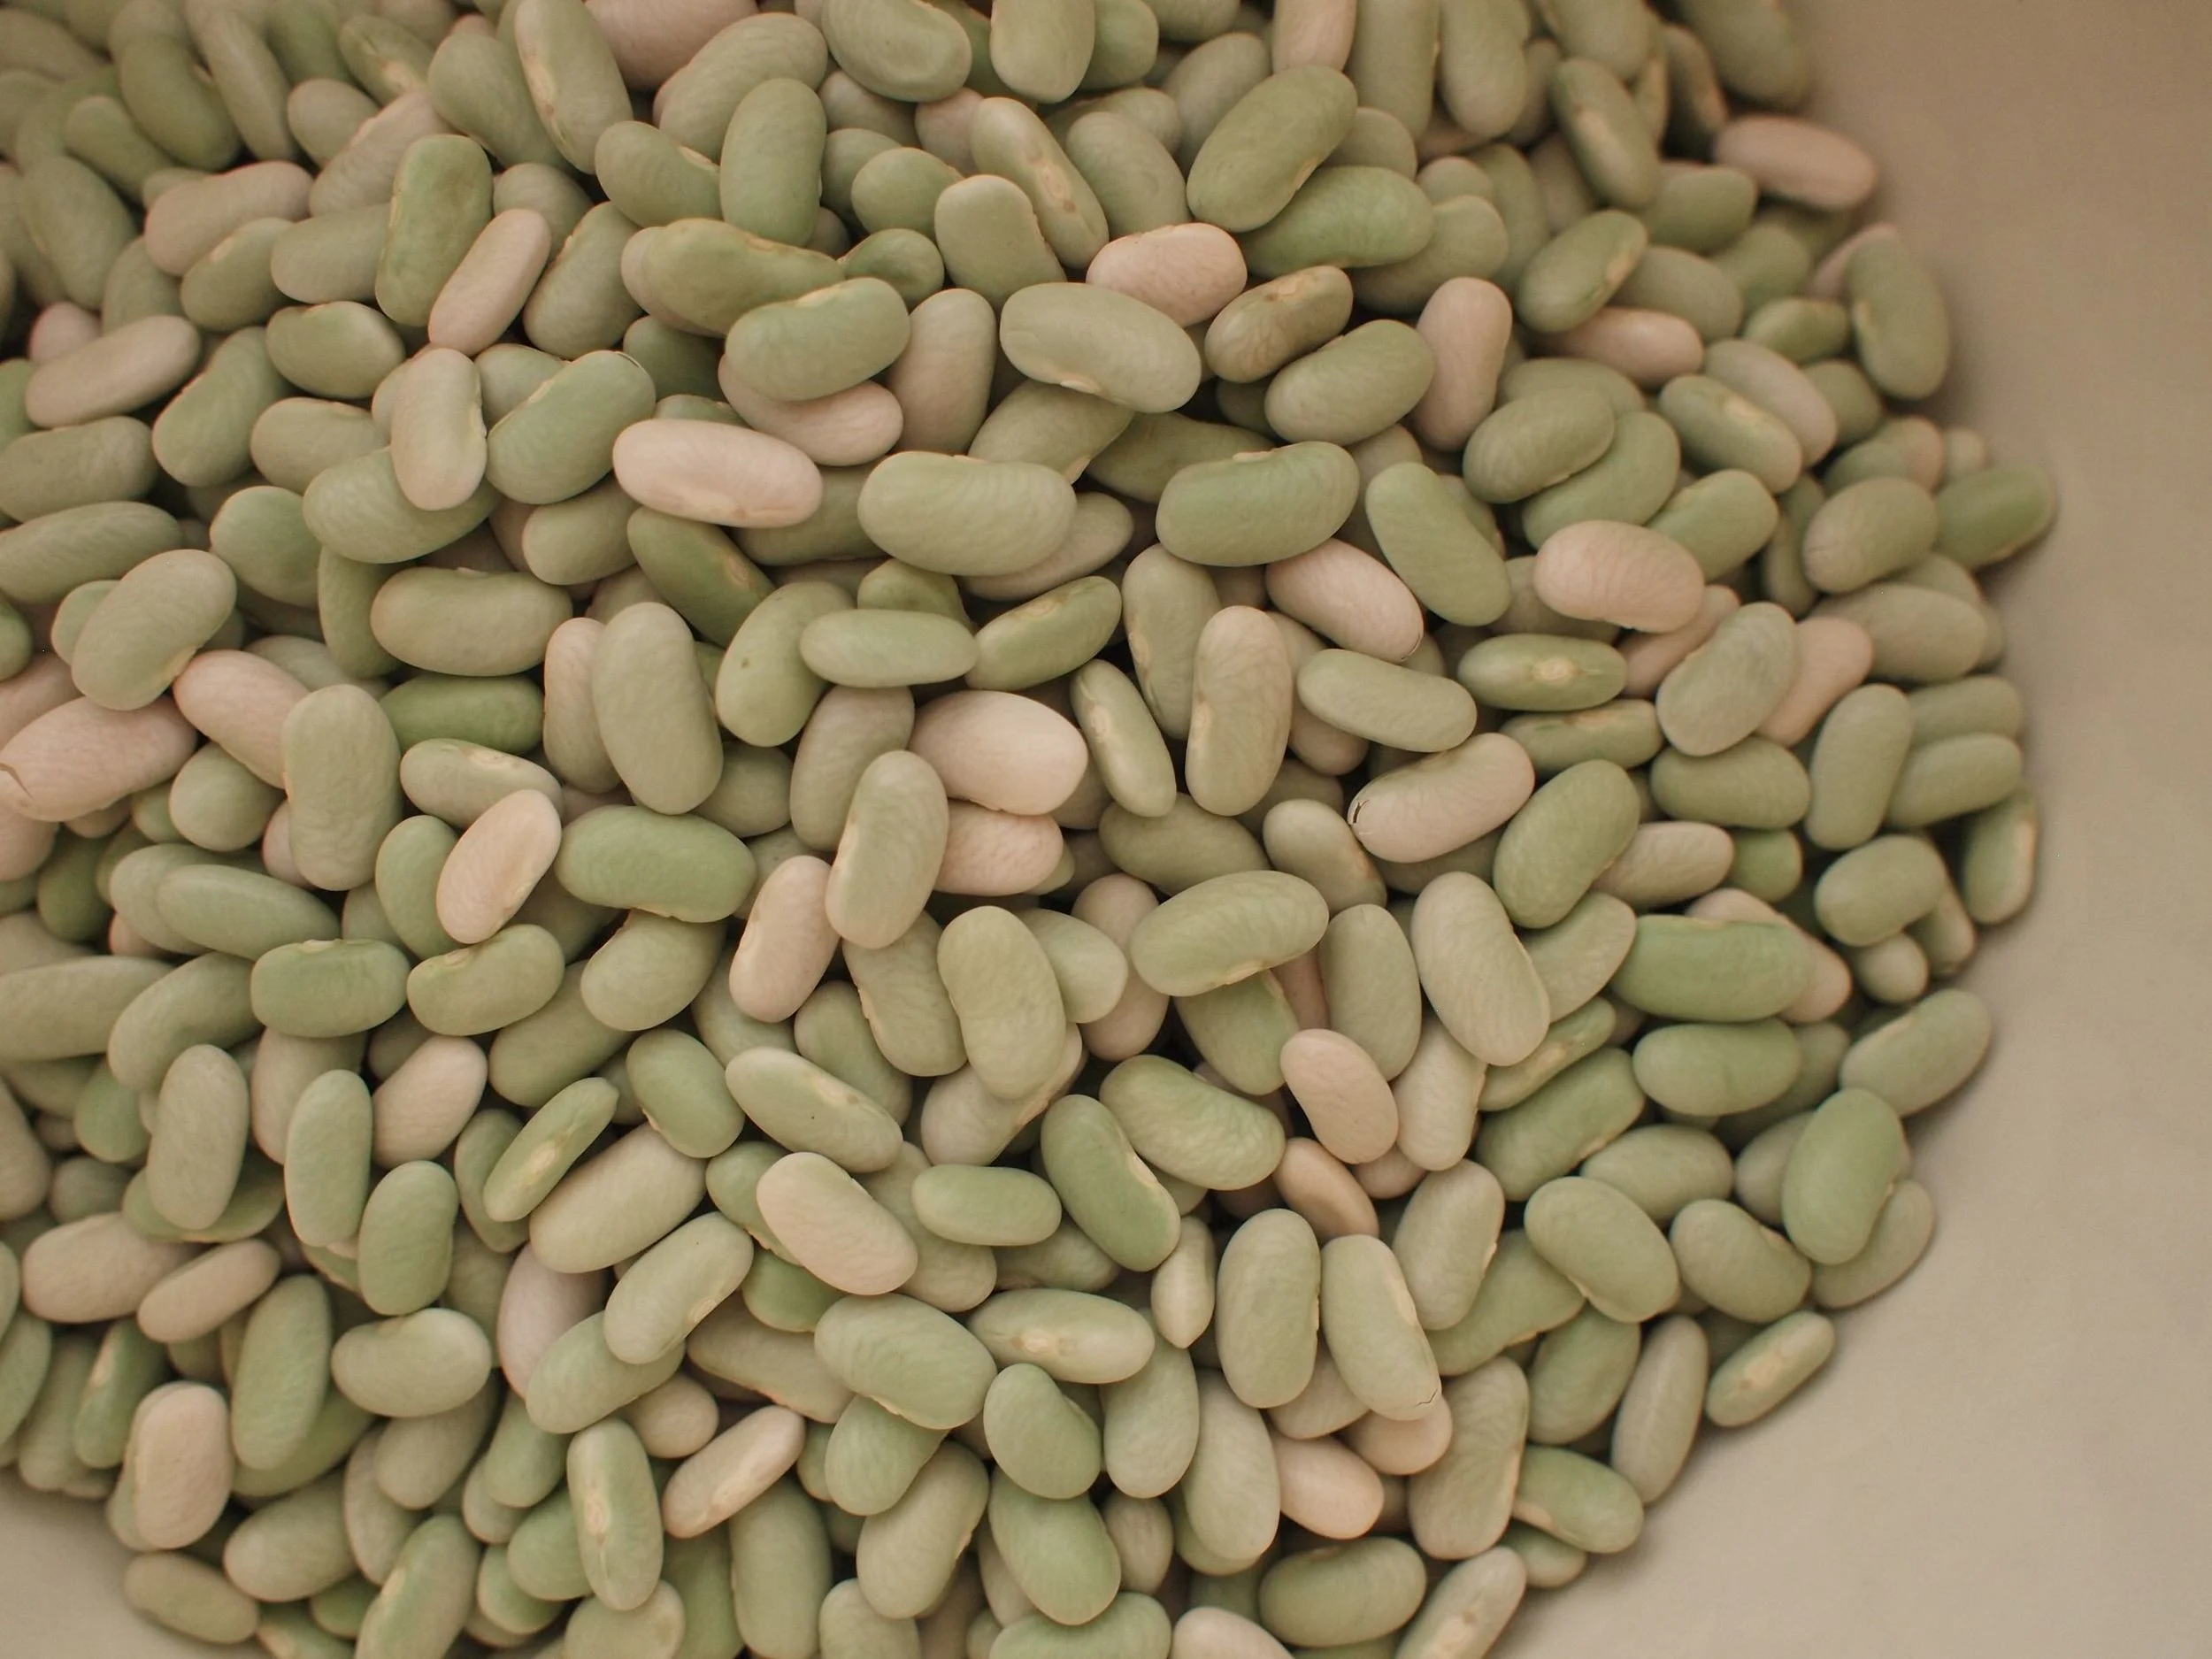
broad beans
from "Living Within", April 2015
Poised as we are on the brink of spring and fresh green, and finding some broad beans in a local market (local to South West France at time of writing - ever so slightly ahead of South East England, season-wise), and with Moroccan produce located at a stall not too far down the line, I was tempted by the idea of sunshine, lemons, greenery and couscous, and a yearning for some Moroccan zest and Eastern promise.
‘Broad’, ‘Windsor’ or ‘Horse’; ‘Fèves’, ‘Ful’ or ‘Fava’, these beans have many guises in many parts of the world, and much history that sits alongside the names and places. Eaten since ancient times and imbued with almost equal parts of myth and wisdom, they are a staple in Middle-Eastern and North-African dishes, often in their matured, dried and dull-coloured form. But at this time of year when they start to appear at their youngest and brightest, it might be that they cook and taste best, having not yet developed either too much starch or too many additional complications.
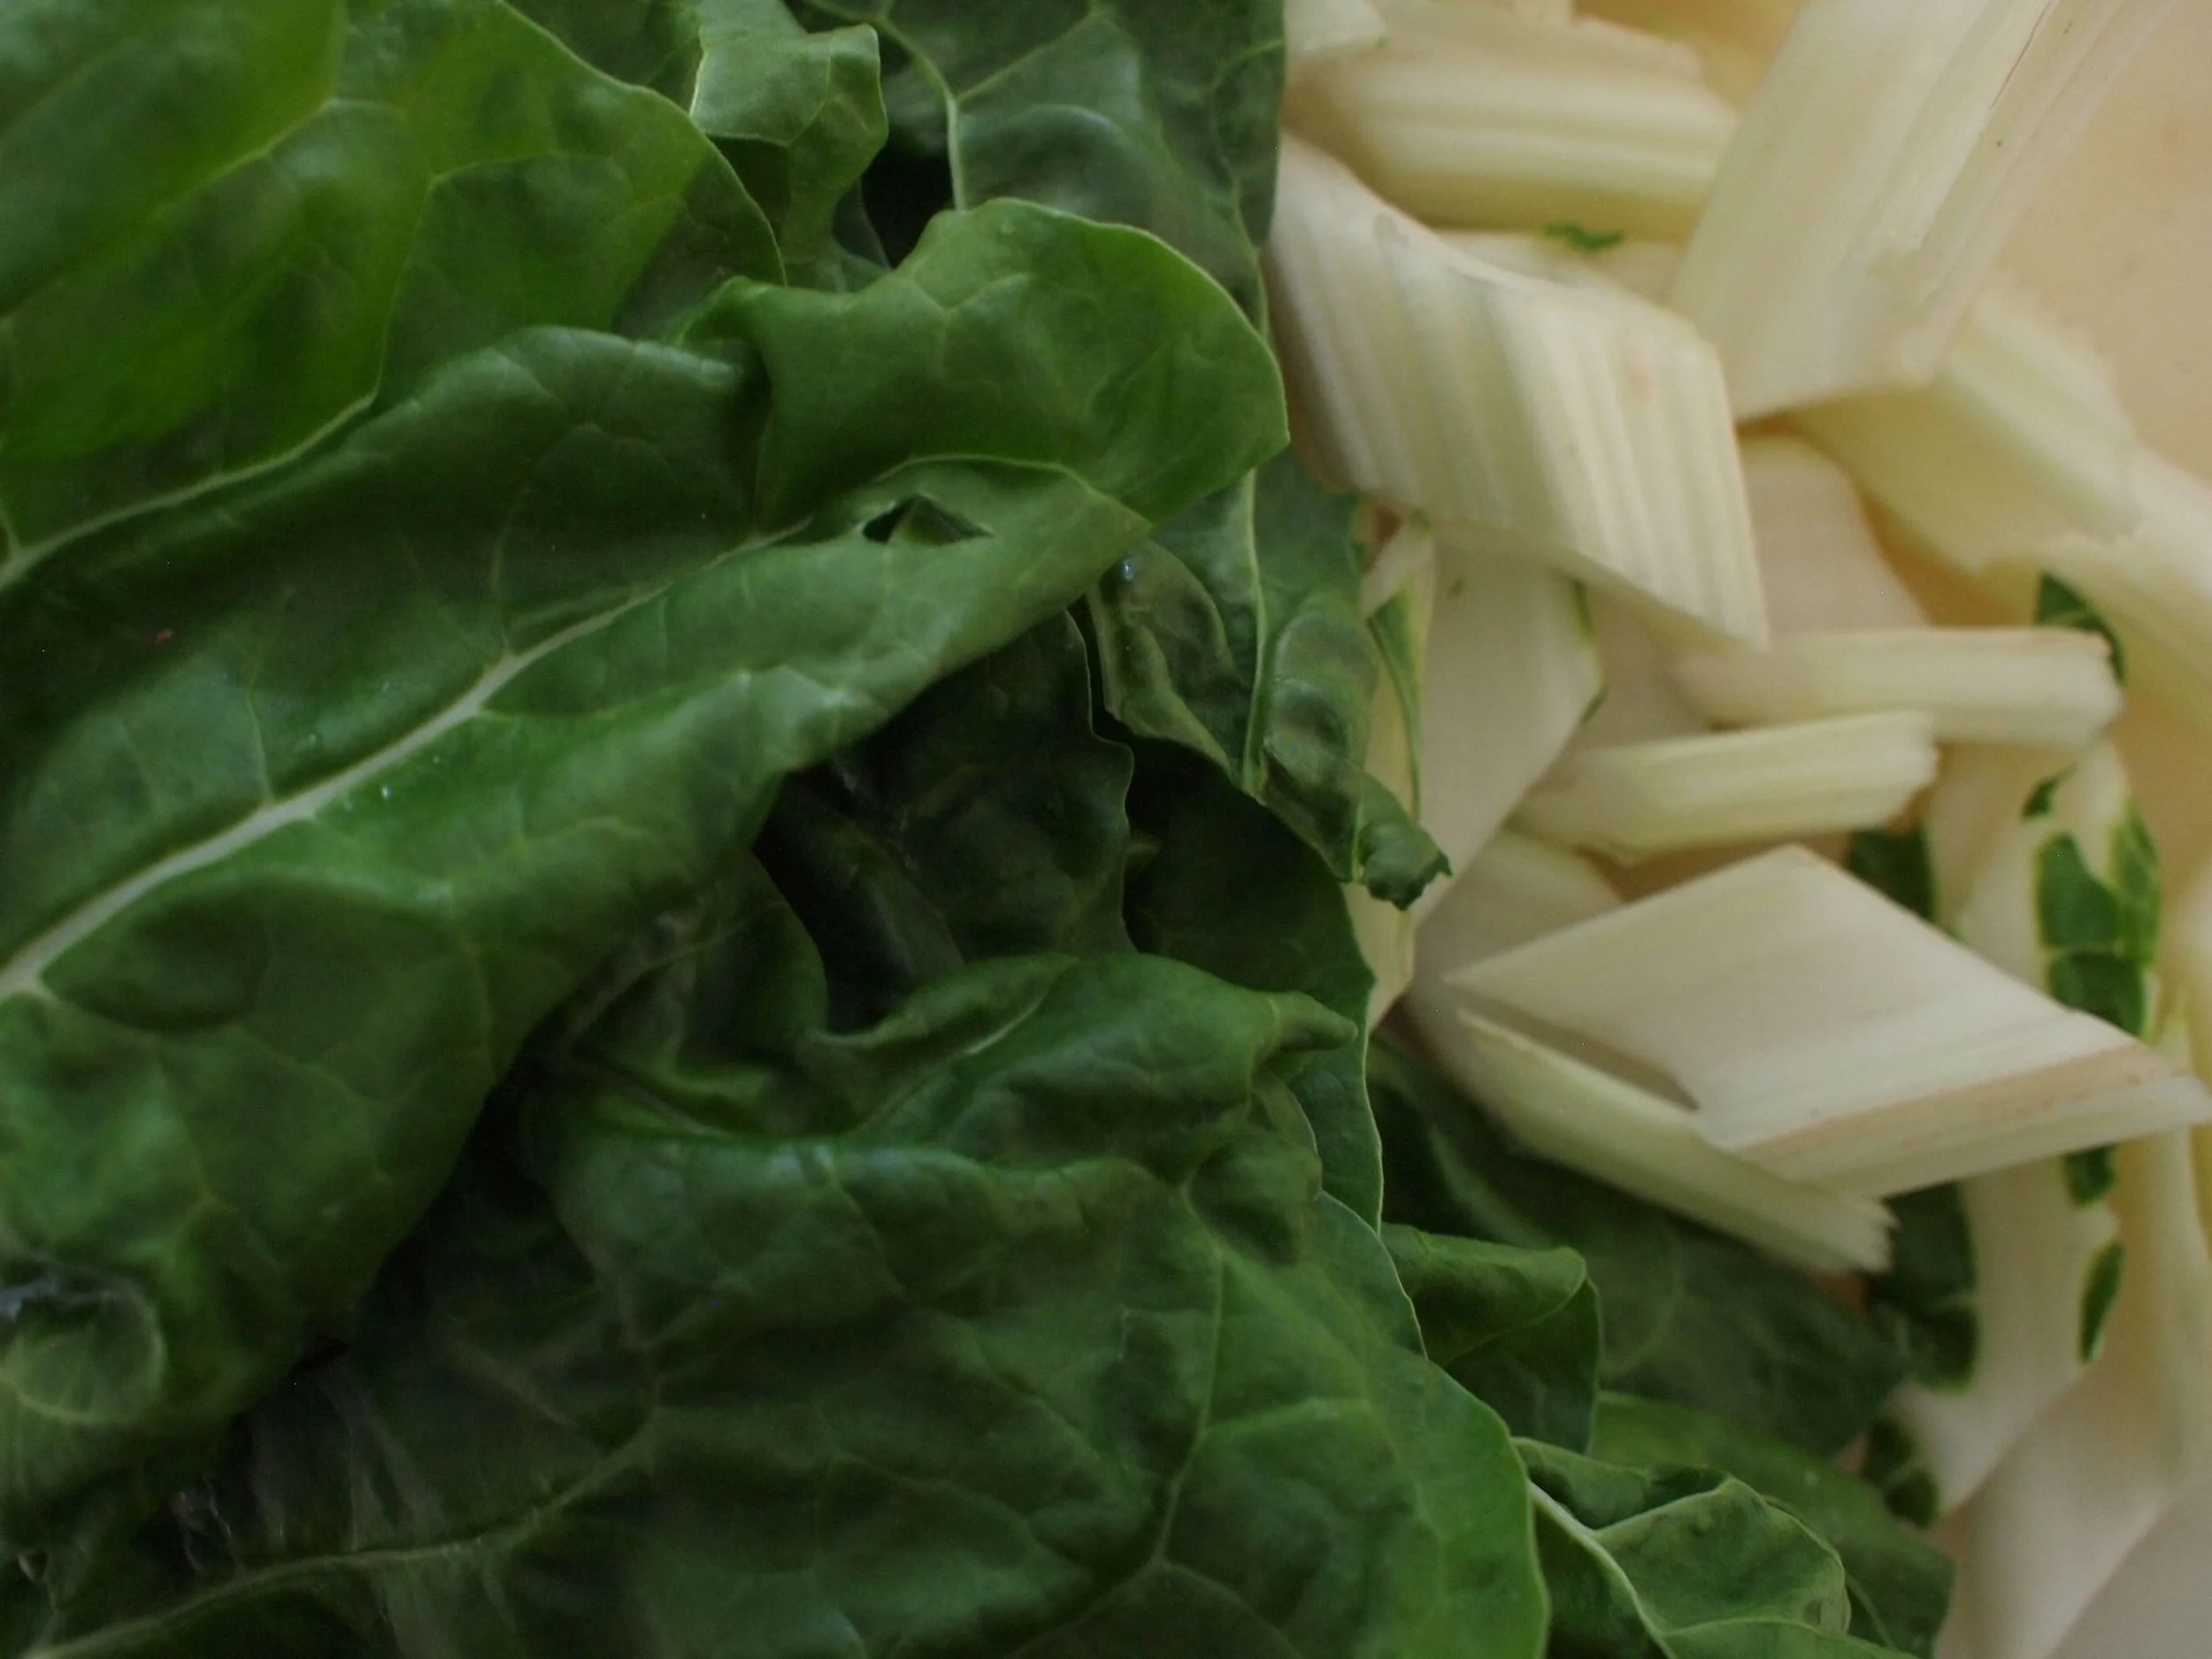
The couscous-based broad bean salad featured here can be as complicated or as simple as you choose to make it; you can spend time aerating the couscous and steaming it subtly, or you can pour over boiling water and follow simple instructions on a packet; likewise you can peel the beans or leave them with soft leather wrinkled jackets, but whatever time you save on these potentially time-consuming aspects, you will need to pod these most indulged beans, and pop them out of their padded velvety cases as a necessary first step.
Buy more than you think that you need; allow more time than you think it will take to shell them - co-opt family or friends wherever possible or put on the radio and settle down to enjoy the task. Once you have a pile of podded beans, put them in a shallow saucepan (big enough that they are not too crammed together) with two or three unpeeled garlic cloves (new season will give the best flavour), some grated spring onion (or other gentle onion), a generous splash of olive oil, salt, a pinch of paprika, a few saffron strands, and a scant quarter of a pint of cold water (5 fl oz/150ml approx.) - bring up to a lively simmer, and then allow to cook gently for between about 5-10 minutes (until the largest of the beans is tender). Stir in a small handful of finely chopped fresh coriander leaves and some ground black pepper, take off the heat, and leave for a few minutes until the contents are cool enough to handle.
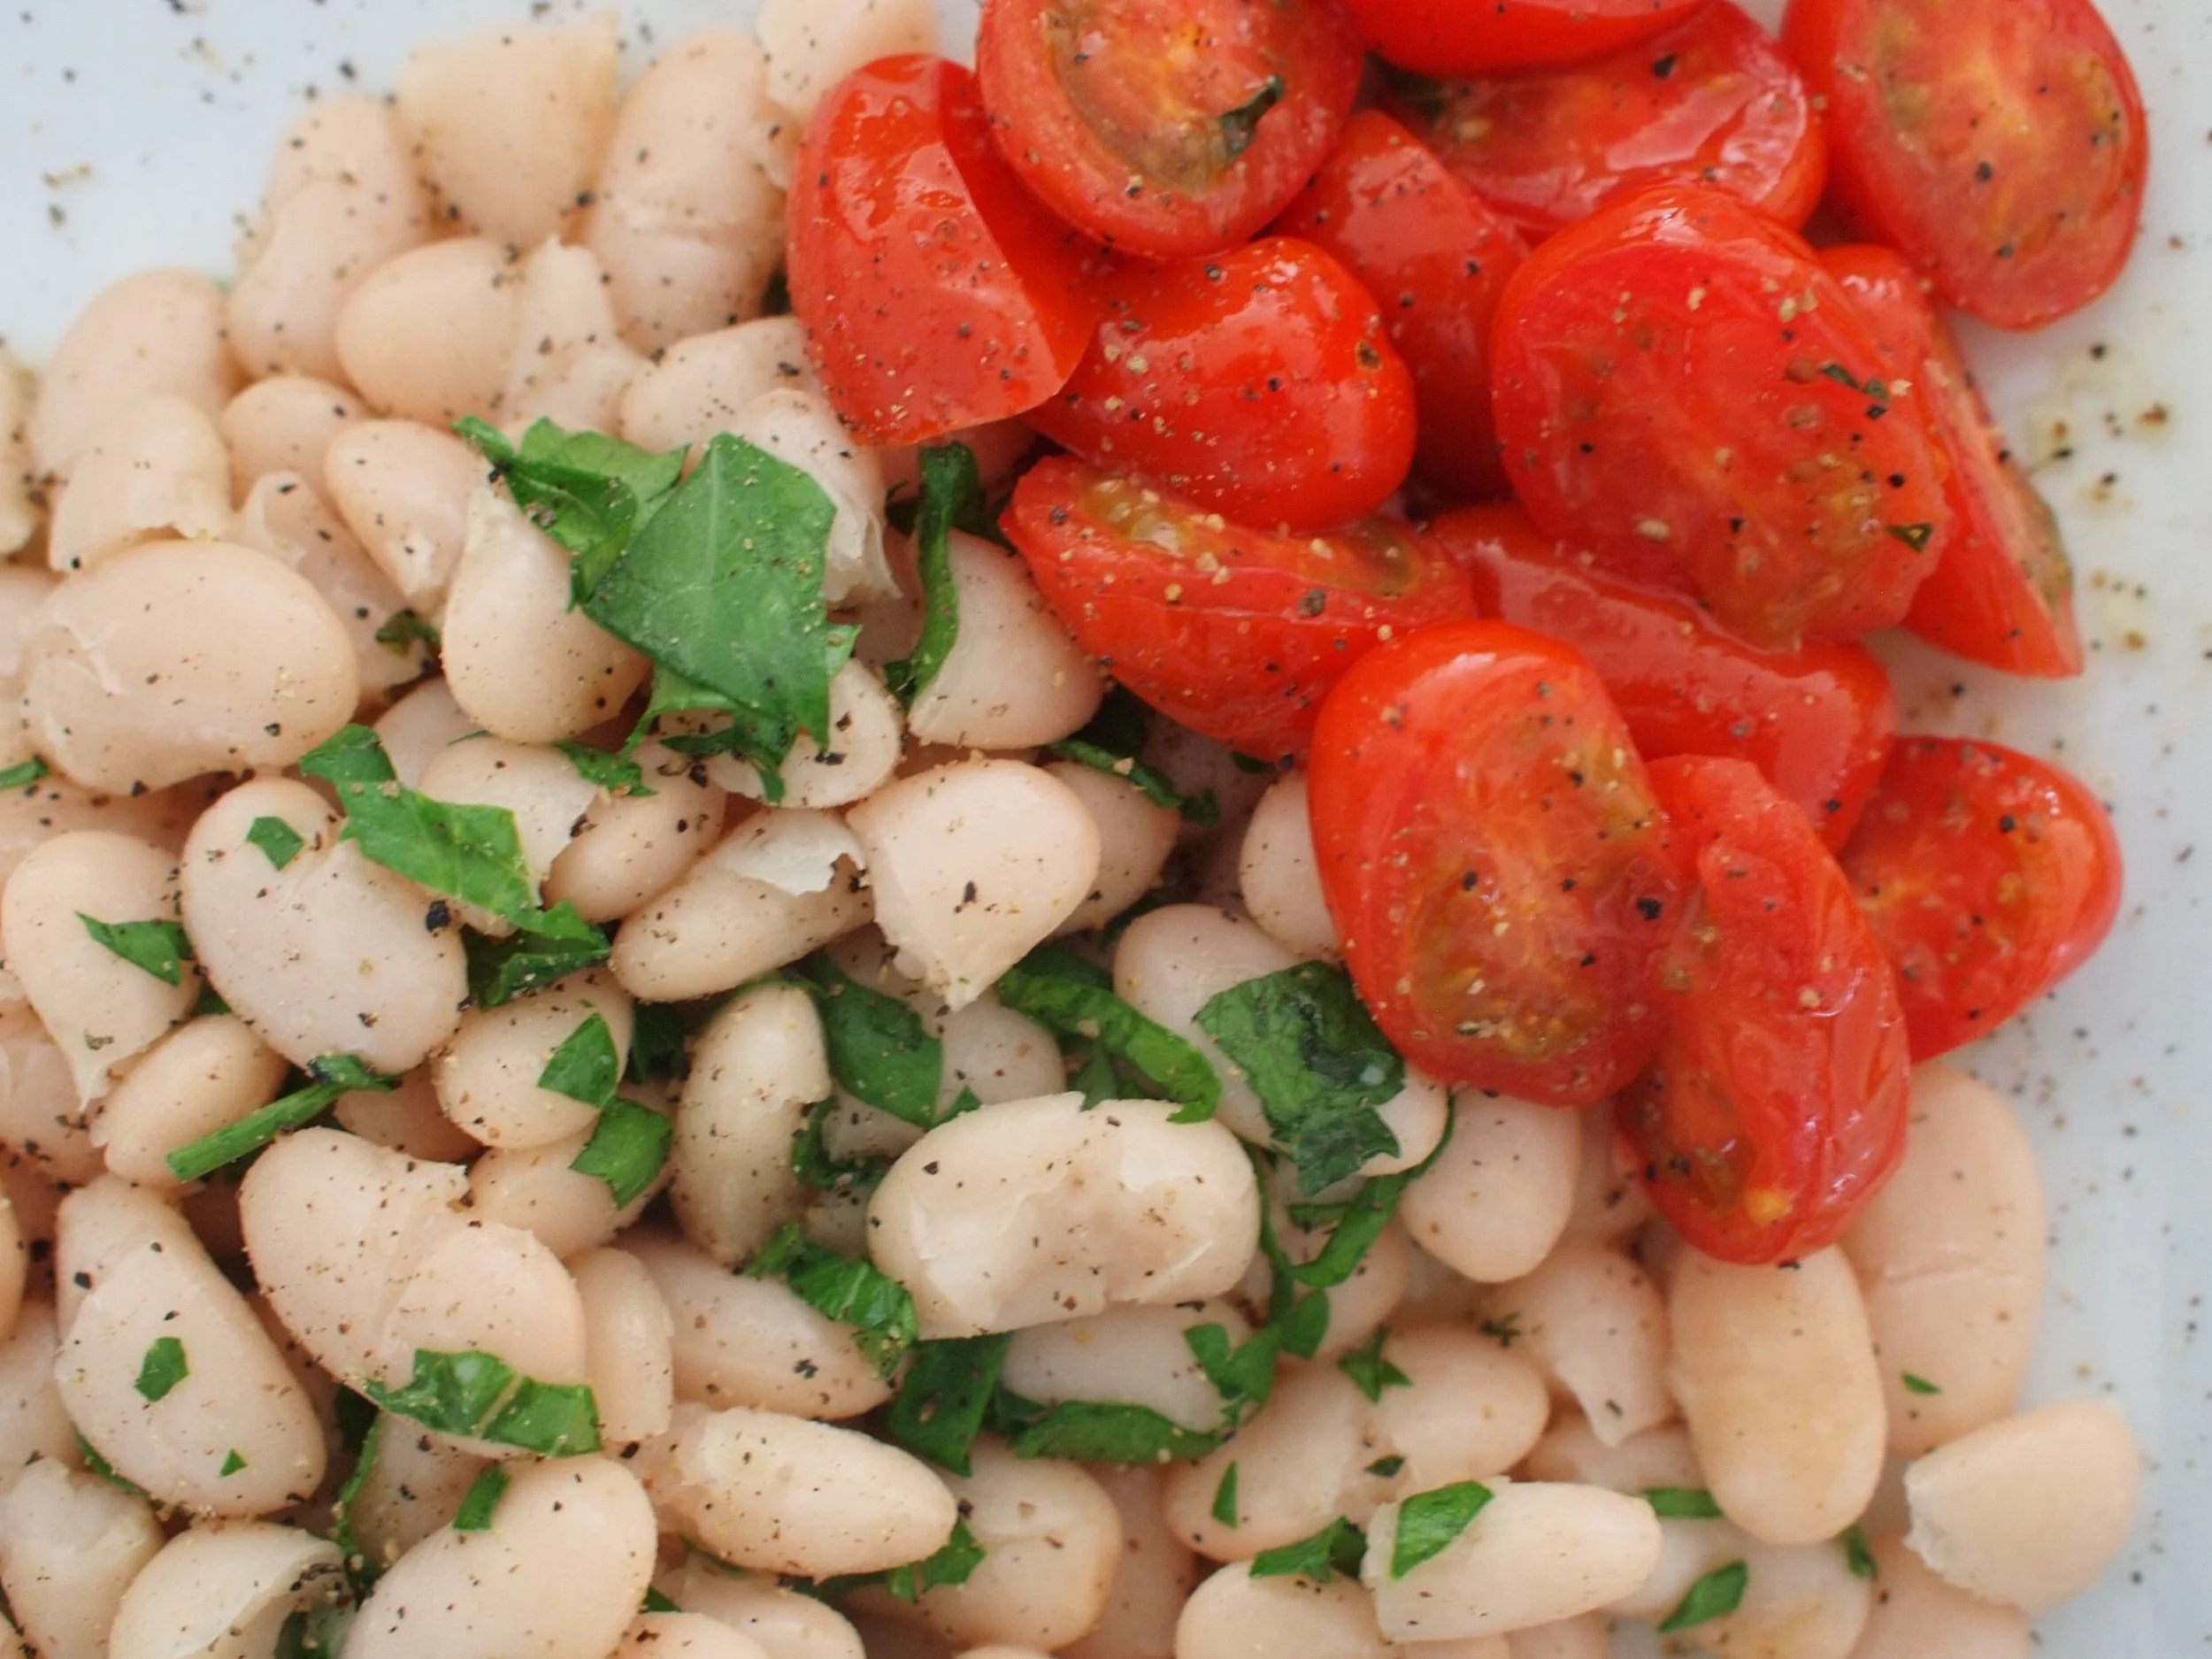
Take out the garlic cloves and remove the skin and put to one side. If, like me, you have perfectionist tendencies, pop the bright green inner beans out of the slightly grey and wrinkled jackets (and throw the jackets away) - or just leave them be if you don’t mind eating all.
Finely chop the poached inners of the garlic cloves, add them back to the beans in their liquid and, finally, add a generous squeeze of lemon juice and allow all to “steep” while you prepare the couscous. If you are Moroccan (or a perfectionist), you will probably “mind” about how well your couscous is aerated and steamed and seasoned, and it will take you (at least!) the best part of an hour to wash and dry and manually manipulate, and leave to absorb residual moisture, and finally to steam in a “couscoussier”, or in a sieve suspended over a pan of infused and aromatic boiling water; and if we are honest, as with all things, it will make a difference to the end result if you take this extra time and trouble. But it will be perfectly acceptable to buy couscous in a box that is easy, and designed to be cooked almost instantly, and to follow the instructions on the packet, if you would prefer not to make too big a deal of the process.
Whichever way you choose, once your couscous is cooked, sprinkle it with a little olive oil, check it for seasoning (and adjust if it is too bland), put it in a serving dish, move it around with a couple of forks to distribute the oil and the seasoning and to remove any lumps, and then add in your broad beans and their liquor (check this for seasoning too, just before you do), and mix all together gently. Leave for a few minutes for the two parts to get to know each other, and then serve as a salad.
Erica x
“Shwiya b shwiya, l’jamal imshi f’sooksoo”


 Russets
 Red Windsors
 Garsons’ display


 a mated pair of pheasants is always to be found together; detail from “


